Showing posts with label Home Improvement. Show all posts

Wednesday, May 17, 2017

Why I Got a Cordless Electric Lawn Mower

Oh Snap!


I Replaced My Broken Gas Mower With A Cordless Electric Mower!

My wife sent me out to use the push mower to mow a small part of our yard that is on the side of the hill and is a bit tricky to mow with the riding mower.  This should have been a pretty easy assignment, but when I pulled the cord to start the mower.... SNAP!  I knew this was bad news, because the starter cord broke last year too.  I ended up buying a new starter coil mechanism for about $40 dollars and installed it.  Since the mower is about 10 years old, it was a tough decision to put $40 into it, but I figured this was cheaper than replacing it.

When the mower broke again, I had the opportunity to revisit this decision.  I decided not to put any more money into this mower.  It still works fine (except for the starter cord), but it was showing its age.  The wheels are worn down.  The plastic deflector for grass coming out has been broken for years and has been re-attached using some wire.  The blade is dull and should be sharpened or replaced..

So I loaded up the old mower and took it to the landfill for a disposal fee of $12.50.  That part was pretty easy.  Now for the hard part- getting another mower.

Why I Got An Electric Lawn Mower

When I had a small yard, I considered getting a plug-in electric mower.  With a small yard, it wouldn't be too hard to plug in an extension cord and reach the entire yard.  I like the idea on an electric mower because that means no gas, no oil, no spark plugs, and most importantly... NO STARTER CORD!

But my yard now is large and ranges from prairie to forested areas beyond the reach of an extension cord.  I mow almost all of it with a nice riding mower equipped with snow chains to help with traction in hilly areas.  The push mower is needed only for trimming and mowing some tight spots that I can't reach with the riding mower.

I decided to get a cordless electric push mower to replace the old gas mower.


There are some full-sized 22 inch cordless electric mowers, but these run around $500.  I found a slightly smaller 16" model from Black and Decker for about $250.  Actually, the small size is handy for reaching the tighter spaces I want to mow with a push mower anyway.

The first problem I had with the Black and Decker is the bag.  This mower is designed to collect grass clippings in a bag.  This is handy sometimes, but emptying the bag is tedious.  I used a wire clothes hanger to hold the rear door open a few inches.  I turned this mower into a rear-discharge mower, and it works pretty well.  I plan to use the bag sometimes, but most of the time I will use it in rear-discharge mode.

Here is a picture of how I used a wire clothes hanger to make the Black and Decker discharge out the back when I don't want to use the collection bag:

Make the Black and Decker a rear-discharge instead of bagging
How to Avoid Using the Collection Bag


A pleasant surprise about the cordless electric mower is how quiet it is.  I can mow comfortably without ear plugs or hearing protection.  It is quieter than a vacuum cleaner, and there are no fumes.  Plus, it is so light that it is easy to move around the yard with it.

I will say, however, that if you are expecting a cordless electric mower to be just like a gas mower then you are likely to be disappointed.  This mower is ideal for light mowing:  fairly short grass, fairly even terrain.  You won't be hacking through thick, overgrown weeds with a cordless electric mower.  That's OK, because that isn't how I use my push mower.

Another potential downside- it looks like a toy.  Black and Decker tried to style it up nice and sporty.  It was a nice try, but the small plastic push mower does look like a child's toy.  This doesn't bother me, but it may bother some people.

This mower comes with two 40V battery packs with 2 amp-hour capacity.  I like that there are 2 batteries included so you can always have a fully charged backup battery ready to go.  These high capacity batteries also work with other Black and Decker tools.  If the mower keeps working well, I will think about getting a cordless electric trimmer too.

Since the cordless mower already came with 2 batteries, I could buy the "bare tool" cordless hedge trimmer for around $50.  You can also get a cordless string trimmer and even a battery-powered snow blower and a battery-powered chain saw that use the same batteries and charger.


Overall, I think an electric mower will last a long time due to fewer mechanical parts to wear out, and it should require no maintenance other than sharpening the blade.  In the long run, I think I will come out ahead by upgrading to a cordless electric mower.


Copyright © 2017 by Dr. Penny Pincher.  All Rights Reserved.  Privacy Policy


Wednesday, January 25, 2017

How Hard Would You Work to Get a Refund?

Who Wants The Money More?

How hard would you work to get a refund?  I have $450 at stake, but so does the other party...

I recently made a big improvement to my kitchen- quartz countertops!  After a couple years of using some mismatched old laminate countertops, and even a bar area that "temporarily" used boards nailed down to make a sort of countertop, I finally got real countertops.  These fancy countertops should last a lifetime, and will improve the value of my house quite a bit.

Quartz Countertop, Awaiting Tile Backsplash

We ordered the countertops through Lowes (I had an offer for 11% off!).  Lowes works with a subcontractor in the area who handles measuring, cutting, and installing the countertops.  The installation went great, except for one minor change of plan.  The quote we got included installing a backsplash made of the quartz countertop material across the nearly 9 foot length of the main countertop where the sink is located.  

Since this is a long run, the plan was to take measurements for the custom backsplash piece after the countertop was installed.  Then the piece would be cut, and another trip would be required to install it.  This all made sense, except when we saw what the countertop looked like, we decided to go with a tile backsplash instead of a giant piece of quartz countertop.

The quartz backsplash would have been nice, but it would have been a lot of the same color and pattern to look at.  So I called the installers right away and told them not to cut the custom backsplash piece and to cancel that part of the work order.

Now for the fun part- getting the money.  The cost for the backsplash quartz piece plus the extra labor for a second trip to bring it out and install it was around $450.  The problem with this situation is that both the subcontractor and Lowes are happier if this $450 is forgotten.  I am the only one who comes out ahead if the bill gets corrected.

On my call to the subcontractor to cancel the backsplash, I mentioned a price difference.  The initial response was that the backsplash wasn't included in the total, so no refund was in order.  But I knew it was.  I had the person pull up the quote to find the extra amount for the backsplash and verify that it WAS included in the total.  She finally agreed and said they would work on correcting the bill and would contact Lowes with an updated (reduced) bill.

About a week later, I called the design department at Lowes to make sure the $450 was actually being removed from the bill.  Guess what the initial response was...  they had not heard from the subcontractor, and the backspash was not part of the quote, so no refund was in order!   I got the person to actually look at the quote and she agreed that I should have around $450 coming back to me.  She said she would contact the subcontractor to talk about updating the billing...

I am pretty confident that after a few more calls I will get my $450.  I am the only one that is going to benefit from correcting the bill, and everyone else loses.  This means that the ball will be in my court to follow up and make sure that this does not get forgotten.

I am also pretty confident that I would not have gotten the $450 if I hadn't taken some initiative to track it down and go get it.  

Sometimes it comes down to who wants the money more.

Update 1:  After 6 weeks, I think the battle is nearly over...  I called Lowes a number of times to ask for a price adjustment, but nothing was happening.  The latest response I received stated that they didn't think the backsplash was included in the original total, so there would be no price adjustment!  Talk about frustrating!  I decided to stay calm and friendly though and handle this like a problem that needs to be solved in the most efficient way possible.

I called the countertop subcontractor (again).  I confirmed with them that the backsplash WAS included in the total (again).  I asked them to send a letter to me with the total.  This was a problem, however, since they say they have to keep their rates confidential since they are a subcontractor.  I asked if they could send a statement (again) to the person at Lowes stating that the backsplash was paid for, and what amount should be refunded.

Then I called the person at Lowes and let her know that the countertop company is sending the amount to be refunded.  About an hour later, she called back and said the refund was being processed.  This sounds promising, but I want to see the money before I am convinced that this really did work out.

I knew getting this refund would be a challenge since I was the only one who would benefit, and I was right!

Update 2:  So on Friday morning, the person at the kitchen design center said I would get a $380 refund since I did pay for a backsplash and we did not install it.  She said she was taking the sheet to the head cashier and would email a copy of the receipt.  That sounded great!  But it is Monday now, and I haven't received a receipt and my account hasn't been credited...  I'm going to have to call again.  Like I said, I am the only one who loses if the refund paperwork gets misplaced of forgotten...

Update 3:  After a quick reminder call, the kitchen designer at Lowes took the paperwork up to the cashier.  The refund was processed (I verified the transaction on my Lowes card account) and I even got a scan if the receipt via email.  Victory!  I think we found out who wanted the money more :-)

Copyright © 2017 by Dr. Penny Pincher.  All Rights Reserved.  Privacy Policy

Thursday, January 5, 2017

You Gotta Check The Clearance Rack...


Today I came home to find the doors to the solarium open after dark on a cold day.  That isn't how you use a solarium.  You are supposed to open the doors when the sun is shining to provide free passive solar heating to the rest of the house.  So why were the solarium doors open?

My wife was eager to show me something new in the solarium.  She had hung some very nice looking curtains alongside some of the windows.  They were extra long 96 inch curtains and looked great in the space.

"Looks awesome!" I said as I was facing her and looking at the curtains hanging behind her.  It probably wasn't clear whether the complement was meant for the curtains or for her.  That's OK, both looked awesome.

The next thing she showed me was even more awesome- the price tag!  The curtains were regularly priced at over $45 and were marked down to under $8.

Clearance curtains from Target!

"You gotta check the clearance rack," she said.  "You never know when you'll find something good."

Sound advice indeed.

There was another great purchase in the solarium- a lamp that Mrs. Penny Pincher found at a thrift shop for only $2!

This is a nice looking, sturdy lamp that is probably from a hotel.  I like that it has the button to turn it on and off on its base where it is easy to reach.  And it is really heavy duty and will probably last forever.  Plus it was only $2 on clearance at the thrift shop.  Did I mention that it was only $2?

$2 Hotel Lamp from the Thrift Shop


"Beautiful!" I said as I looked at the lamp on the table behind my wife.  Again, it was probably not clear which I was complementing, but that's OK.

Gotta check those clearance racks!


Copyright © 2017 by Dr. Penny Pincher.  All Rights Reserved.  Privacy Policy


Saturday, August 20, 2016

Can I Do Plumbing Myself?


Can I Do Plumbing Myself?

Let's go to the mailbag today for a question from a reader:

Do Plumbing Yourself and Save Money!
Image Courtesy of Pixabay
"Dear Dr. Penny Pincher, 

Read your article on updating older home inexpensively. Interesting and informative article. 

One thing that we need to do in our older home is to replace the bathroom sink pop up drain. Ours is old and discolored while the sink is old but in good shape. 

Is it difficult to do for someone with no plumbing experience??? Our plumber has a minimum charge which is expensive. Thank you"

Thanks for mentioning my article on cheap ways to update an older home!  As you may know, I am a staff writer at Wise Bread and my articles are syndicated on sites including time.com, Kiplinger, Christian Science Monitor, Money Magazine, and other top sites around the nets.  You can read the article 19 Frugal (And Easy) Ways To Upgrade An Old Home at Wise Bread.

In this article, I mentioned a couple plumbing-related upgrades, including replacing a bathroom sink and replacing a kitchen sink.  These projects involved working with both plumbing supply lines and the drain lines too.  Actually, the kitchen sink was an even bigger project than I indicated in the article.  We tore out the cabinets and cut off the copper supply pipes about a foot off the floor and rebuilt everything from there.

I agree that plumbers are expensive.  I have been billed around $75 to $100 per hour for plumbing.  Sometimes plumbing companies send more than one plumber, and you get billed even more for that.  That is why I started figuring out how to do plumbing myself years ago.

The biggest problem with doing your own plumbing is leaks.  I think everyone's first few plumbing projects are likely to leak.  A leaky drain is less of a problem since it only leaks when you turn on the water.  A leaky supply is much worse since that can leak all the time.  The damage can range from water stains up to serious water damage.

The key to doing your own plumbing is to check for leaks and keep re-doing it until it doesn't leak anymore.  If you can't get it to stop leaking yourself, you'll need to call a plumber.  If you don't want to mess around with checking for leaks and re-doing things you might be better off just calling a plumber right off the bat.

But with practice and experience, your plumbing work is less likely to leak.  And if it does leak, it gets easier to figure out why and solve the problem.

The next biggest problem with doing your own plumbing is lots of trips back and forth to the store to try to find the right parts.  There are so many sizes and materials that it sometimes takes me a few tries to get the right parts that fit together correctly.  Often, it is hard to know exactly what parts you need until after you have taken apart what you are working on.

Even with all of the hassle of doing plumbing yourself, you can save a lot of money if you are patient and careful to do the job right.  I like to do my own plumbing whenever I can.

Changing a pop-up drain should be a pretty simple project.  This only involves the drain, so if it doesn't work out, you can avoid any leaks or damage simply by waiting to use that sink until everything is working right.

I would start by reading some articles about how to replace a pop-up drain.  I have an old Bob Vila home improvement book that I like to read before starting a new project.  You can also find articles like this one on the interenet:  How to Replace a Pop-up Drain.

It looks like you need to replace a bit of the drain assembly below the sink as well as the pop-up fixture that you can see from above the sink.  I would carefully disassemble the parts and then take the parts you removed into the home improvement shop to find suitable replacement parts.  If it doesn't work out for some reason, keep the receipt and you'll be able to get your money back or get different parts.

Best of luck!

Dr. Penny Pincher


Copyright © 2016 by Dr. Penny Pincher.  All Rights Reserved.  Privacy Policy

Wednesday, February 10, 2016

Cheap Ways to Deal with Peeling Paint on an Old House

Peeling Paint, Old Siding, What To Do?

Is There A Better Way?

My latest article on Wise Bread triggered a great question from a reader:

"Dr Penny Pincher,

Read your article on the hidden costs of buying an old house.  Very informative, practical, and interesting.  Anyone buying an older house should consider all of the potential costs you mention when buying an older property.

We live in an older home and have for some time.  One of the potential problems we are considering is the painting and upkeep on the outside of the house.  Our home has the original cedar shake siding and requires maintenance every year in addition to periodic painting of the entire house which is two stories. We are reaching an age where using a ladder probably is not a good idea. 


Do you have suggestions for an inexpensive way to maintain the house without the expense of siding??

Thank you,

A Penny Pincher Follower"


Thank you PPF for your question!

A few years ago while painting my 2+ story house, I realized that I have a mild sensitivity to heights.  I had nightmares about falling off of a ladder, and my palms were sweating and my hands shaking when I got much above one story high.  I can understand why you don't want to go up on a ladder to paint!


Unfortunately, going up on a ladder is probably the least expensive way to deal with old siding.  It seems like old wood gets moisture in it and has trouble keeping a good coat of paint more than a few years.  Even a really great paint job might only last a few years.

Here are things you can do to deal with peeling paint on wood siding, in order of cost:

1.  Paint the house yourself
This may cost a few hundred dollars for the paint.  You can reuse paint brushes and ladders for many years.  The drawbacks of painting yourself are that you have to go up on a ladder and spend a lot of time scraping off the peeling paint and repainting.

2.  Hire someone to paint your house
This may cost several hundred to a couple thousand dollars depending on the size of your house and who you hire.  As with hiring someone to do anything, you have to worry about the quality of the work and deal with having strangers around on your property.

3.  Move to a newer house with vinyl siding
Most newer houses have vinyl siding or other zero maintenance siding.  I ended up moving to a newer house after I painted my old house.  The cost to move varies with how much stuff you have and whether you need to hire movers.  My last move cost about $2,000.  It may sound extreme, but moving to a newer house will get you out of painting...

4.  Replace old wood siding with zero maintenance siding
Before I painted my old house, I looked at going over the old wood siding with new vinyl siding.  The estimates to install vinyl siding were in the range of about $30,000 to $40,000.  This was a large house with lots of windows, so these numbers may be higher than for a typical house.  In any case, replacing siding is a major expense.

I hope one of these options works for you.  Go with option 2, 3, or 4 to avoid going up on a ladder.  Best of luck!


Copyright © 2016 by Dr. Penny Pincher.  All Rights Reserved.  Privacy Policy


Saturday, January 23, 2016

Home Disimprovement: Downgrade and Save Money

For Cheapskates Only...

Home Disimprovement Can Save Money

When I bought my house a couple years ago, it had two doorbell buttons near the front door.  The funny thing was that neither one worked.  Pushing the buttons did not make the doorbell ring.

Here's what I think happened: the original doorbell button installed when the house was new in 1981 stopped working at some point, so someone installed a second doorbell button.  The replacement was a wireless doorbell button, and was installed right next to the first one.

I didn't pay much attention to the doorbell button situation until Halloween.  Trick-or-Treaters were pushing the doorbell buttons, but nothing was happening and we didn't know anyone was there waiting outside.  Visitors did not know to knock since there were two doorbell buttons.  It was rather confusing.

So what to do?  I thought about putting up a sign that says "Please knock, doorbells don't work".  I decided against this because it would look sort of tacky to post a sign explaining that something doesn't work.  Plus, I thought the sign would get wet and fade over time and would require periodic replacement.  So I needed to figure out another solution to the doorbell situation.

Maybe I should fix the doorbell button?  Perhaps add a third doorbell button next to the existing two broken ones?  But then I would probably need to add a sign to indicate which button works.  Plus I would need to find and buy a doorbell button, install it and get it working.  This sounded like a lot of trouble.  I needed an easier solution, and I found it.

I decided to do a downgrade and save some money.  My dogs usually bark like maniacs whenever someone even thinks of approaching the house.  It would be hard to hear a doorbell ring over the barking of my dogs anyway.  Why not just remove the broken doorbell buttons?  This wouldn't cost anything, and then it would be obvious to visitors that they should knock without the need for signage to explain which doorbell button to press.

I disconnected the doorbell ringer from the transformer and removed both broken doorbell buttons next to the front door.  I used some caulk that matches the siding to fill in the hole.  Problem solved.  Cost: $0.  Time: about 10 minutes.

After "downgrade" I no longer have a doorbell...

In this case, I am better off with zero doorbell buttons than with three doorbell buttons.  Sometimes a downgrade is better than an upgrade, and you can save some money as well.


Copyright © 2016 by Dr. Penny Pincher.  All Rights Reserved.  Privacy Policy

Wednesday, June 17, 2015

Air Conditioner Troubleshooting Adventures

Avoid Expensive Air Conditioner Repairs!

Avoid Expensive Air Conditioner Repair
Image Source: Dr. Penny Pincher
Summer has arrived, and that means it is time for central air conditioning if you have it, and if you are lucky enough to have it working.  As you'll see, I have not always been so lucky...

Growing up in an old farmhouse on a small farm, we had no air conditioning.  We had fans in the bedrooms and in the living room.  The downstairs wasn't too bad, but the upstairs bedrooms were pretty warm at night, even with fans going.  When I was about 14 we installed a window air conditioner in the living room.  I don't remember how much that cost, but I think it was about $100, and I know it used a lot of electricity.  We ran it on a few of the hottest days of the year and it made a big difference.

Tips to Keep Your Air Conditioner Working

Since then, I have owned several houses and all but one of these had a central air conditioner.  Almost every central air conditioner I have owned has had some trouble.  In general, there some simple things you can do to avoid trouble with your central air:

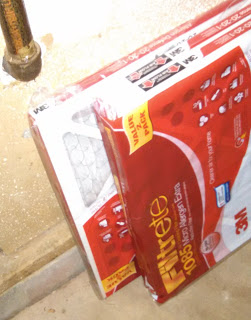
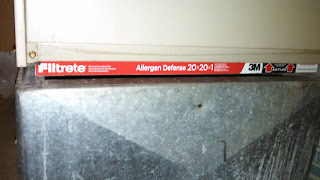
  • Change the furnace filter regularly.  If the filter is dirty, it reduces the air flow and reduces the cooling effectiveness.  If you don't remember when you last changed it, it is probably due for a change...
  • Trim back plants growing around your A/C unit to allow the heat exchange to work efficiently.
  • Use fans instead of central air when it makes sense.  A fan right next to you can keep you cool, and using a fan is less expensive and saves wear and tear on your expensive A/C unit.

Installing New Furnace Filters Can Avoid A/C Issues
Image Source: Dr. Penny Pinche

Each time I have called a repairman to troubleshoot the central air, it has cost more than the window air conditioner that we bought growing up- just for the repair!  A new central air conditioner costs about $3,000 to install, depending on the size.  Repairing a central air conditioner costs $100 to $300 or more, depending on the problem.


This is Where Furnace Filters are Installed
Image Source: Dr. Penny Pincher

Air Conditioner Repair Incidents

Following are accounts of the incidents I have had with my air conditioner over the years, and an explanation of each problem.  Hopefully this will help you avoid some expensive service calls or at least understand what could be wrong with your air conditioning.

A/C Incident 1:  A/C running, but not cooling.  We moved into a house in the winter time and tried to turn on the A/C when summer came around.  Everything seemed to be running, but it just wasn't cooling.  I called a furnace repairman to come and check it out.  This system had a furnace filter installed in the ceiling, which I did not find when I was checking for problems.  Simply changing the very dirty filter made the A/C work well.  This service call was around $100!

How to avoid expensive repair:  Make sure you find your furnace filter and change it!

A/C Incident 2:  A/C not running.  My wife was 9 months pregnant.  It was July and very hot, with temperatures running over 100 degrees at nearly 100% humidity.  This was a house that I just bought, and I wasn't very familiar with the infrastructure.  The A/C stopped working mid-morning on the 4th of July.  I wanted to wait until after the holiday weekend to call a repairman since it was a holiday, but my wife was pretty uncomfortable anyway and it was only getting hotter, so I called a repairman right away.

The problem turned out to be a blown fuse in the fuse box right next to the A/C unit outside.  I checked the circuit breaker panel inside, but it didn't occur to me that there would be a separate fuse box outside with glass fuses.  The repair bill was around $200!

How to avoid expensive repair:  If your A/C unit stops running, check for a fuse box next to the unit.  You can probably get new fuses for about $1 each...

A/C Incident 3:  A/C running, but not cooling.  We lived at an old farmhouse that we were fixing up.  One of the first improvements we made was to add a central air unit.  It worked great for 3 or 4 years and one summer it just wasn't cooling.  I checked the furnace filter- but it was totally clean.  We didn't want to spend money that year to call a repairman, so we went all summer without using the A/C.  The next spring it still wasn't working.  I had been reading about A/C troubleshooting on the Internet and had isolated the problem to inside the plenum.  I wasn't willing to cut into it- we can live without A/C, but I didn't want to risk ruining the furnace.  Heating is not optional in Iowa...

So, after a year without working A/C, I finally called the repairman.  I was right that the problem was in the plenum.  Somehow, a bunch of dog and cat fur had accumulated inside and was almost completely blocking the flow of air.  Apparently a furnace filter had gotten very humid and collapsed, leaving the air return unfiltered for some time.  We had the return air cover off while working on some things, so tons of fur got into the furnace.  After the repairman removed the fur mat that had formed and sealed the plenum back up, it was good as new.  It cost over $300 for this repair!

How to avoid expensive repair:  Make sure your furnace filter is installed correctly and is in good condition.  Dirt and fur can cause real problems if they get into your plenum.

A/C Incident 4:  A/C not running.  This incident happened at the farmhouse as we were selling it and moving out.  We needed to repair the A/C so it would be working for the buyer.  The problem was that a mechanical component failed in the air conditioner.  I didn't pay much attention to what it was since we were moving out.  This repair cost about $150.

How to avoid expensive repair:  Some repairs cannot be avoided-if your A/C has a mechanical failure, it will need new parts.

No More A/C Problems!

This is my second summer living at my current house and I have not had any trouble at this house with my air conditioner... not yet anyway...

Good luck staying cool this summer, whether you use a fan, window air conditioner, or central A/C.


Copyright © 2015 by Dr. Penny Pincher.  All Rights Reserved.  Privacy Policy

Friday, May 15, 2015

Rubberific Rubber Mulch- Lasts for Years

Rubberific Rubber Mulch


Bags of Rubberific Rubber Mulch
Image Source: Dr. Penny Pincher

When my wife brought home some bags of rubber mulch to try this spring, I was skeptical.  Regular wood mulch is pretty cheap and works pretty well.  We usually get the cheap Cyprus mulch.  The down side of wood mulch is that it breaks down and looks faded and old after less than a year.

Rubberific Rubber Mulch is an interesting idea.  It is made from shredded up tires that are dyed.  It looks just like wood mulch, and considering that old tires seem to last forever, I think this mulch will last a long time.

Rubberific Rubber Mulch In My Flower Bed
Image Source: Dr. Penny Pincher

The rubber mulch itself is really light since it is dry.  I am used to picking up bags of wood mulch that are much heavier for the same volume.  I was surprised how much the shredded rubber looks like chipped wood.  You wouldn't notice unless you are really looking closely.

Rubber mulch could be one of those things that is more expensive at first and pays for itself over the years.  Replacing mulch every year not only requires the cost of the mulch, but also time and the gas to drive around to get the mulch.  The Rubberific rubber mulch costs about 3 to 5 times as much as wood mulch, depending on what kind of wood mulch you get.  This product has a chance to be cost effective if it really does last 10 to 15 years.

Rubberific Rubber Mulch- Shredded Tires Looks Like Wood Mulch
Image Source: Dr. Penny Pincher

Just as I was getting impressed and thinking that rubber mulch really is "Rubberific", I remembered the mulch we used in a different flower bed this year.  It was a rock mulch.  The rock mulch will last much longer than 10-15 years- more like billions of years!  But wood mulch looks better than rocks in the shady location in front of our house, so the choice is between wood and rubber.  In the shade, it may last even longer than the advertised 10-15 years, so I may never need to replace it.

I can think of a few downsides to using rubber mulch.  It is more expensive than wood mulch.  Since the recycled tires certainly contain a lot of chemicals, I wouldn't want to use it around vegetable plants or fruit trees.  Also, I think rubber mulch placed in the sun could get really hot and maybe even smell like rubber tires on a hot day.

I think trying out rubber mulch in a shady flower bed is a good place to experiment with it.  If you use mulch in your landscaping, check out rubber mulch for a longer-lasting alternative to wood mulch.


Copyright © 2015 Dr. Penny Pincher.  All Rights Reserved.  Privacy Policy

Tuesday, May 5, 2015

Cheap Duct Tape Projects and Repairs

Duct Tape for Cheap Projects and Repairs


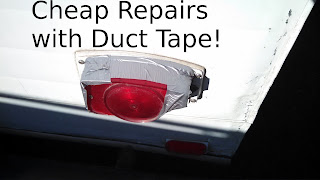
Trailer brake light repair with duct tape
About 35% of one of the brake light covers on my trailer was missing.  This was pretty easy to repair!
Image Source: Dr. Penny Pincher

Duct tape is useful for making quick repairs and doing simple projects.  If a few cents worth of duct tape can save you from replacing something for awhile at least, it is probably worth doing.  Some of the features I like about duct tape are:


  • Duct tape is fairly cheap, a few bucks for a roll 50 or 100 feet long that will last you a long time
  • Duct tape is durable, some repairs and projects using duct tape will last many years
  • Duct tape is easy to work with- you don't need any special tools, skills or experience


Duct Tape is Handy to Have Around for Projects and Repairs
Image Source: Dr. Penny Pincher


I like duct tape so much that I mentioned this as a topic in my most recent book as one of the 101 ways to save money.  You can read Tip 90 about using duct tape for cheap repairs here:
Tip 90: Duct Tape and Other Cheap Repairs

Duct Tape Repairs

Repair Gloves with Duct Tape

The other day while working in the garden, I felt some weeds poke my thumb.  This was surprising since I was wearing heavy leather gloves.  Unfortunately, a hole had developed in the thumb.  This was clearly a repair that called for duct tape.

Use Duct Tape to Repair Gloves
Image Source: Dr. Penny Pincher

It took about 1 minute to repair the glove with duct tape.  In the picture, you can see that one of the fingers has also been repaired with duct tape.  I put that duct tape on last fall, and it has lasted through quite a bit of use already.

Repair Garbage Can with Duct Tape

After making this repair, I decided to look around and see what other repairs and projects I had around that use duct tape.  I didn't have to look far.  Right next to the workbench where I repaired my gloves, I have a garbage can with the lid repaired with duct tape.

Garbage Can Repaired with Duct Tape
Image Source: Dr. Penny Pincher

It would seem silly to me to throw away a garbage can or garbage can lid that would be repaired with duct tape.  The lid had broken and it would no longer snap in place on top of the garbage can.  I was able to simply tape the lid back together so that it fits on nicely again.  This repair has lasted for about 6 months so far.  The duct tape if flexible enough to handle some abuse as the lid gets dropped to the ground by the garbage man every week.  I guess I could have used black duct tape to make the repair blend in a little better, but the silver doesn't really bother me.

Duct Tape Projects

Continuing my walk around the house to see where I have used duct tape, I found some projects where duct tape was a key component.

Window Crank Pole Duct Tape Project

The first is my contraption to crank open 2nd story windows.  Before I made my pole, I would need to use a ladder to open and close the windows.  The pole is an old telescoping pole for a swimming pool net.  I duct taped a loop of heavy shoe lace on the end.  I used more duct tape to pad the metal pole to avoid scraping up the window cranks.

Duct Tape on Pole to Crank 2nd Story Windows
Image Source: Dr. Penny Pincher

As you can see in the picture above, I got fancy and used two different kinds of duct tape.  I used the thinner, stickier 3M silver duct tape to hold the shoe lace in place, and then I used the thicker black Gorilla duct tape to provide padding over the exposed end of the pole.

Telescoping Pole to Crank High Windows
Image Source: Dr. Penny Pincher

This project was great- it only took about 15 minutes, it didn't cost anything since I had the materials around, and it was immediately useful.  I was able to crank my windows open that day without getting out a ladder.  I have been using my duct tape window pole for about 2 months now.

Temporary Table with Duct Tape

In the room with the high windows, I have a table set up to start vegetable plants from seeds for my garden.  The table I used is actually a temporary arrangement using some saw horses and scraps of wood.  I used duct tape to tape everything together.  With kids and pets running around, I wanted to make the temporary table as stable as possible.

Temporary Table from Scraps of Wood, Saw Horses, and Duct Tape
Image Source: Dr. Penny Pincher

Duct tape was handy for this project, since I was able to make a stable table using some pretty small scraps of wood.  I didn't want to put screws into the saw horses, and that would have been more work anyway.  Now that I am done with the temporary table- the plants are going into the straw bale garden this weekend- I can just remove the duct tape and get my scraps of wood and saw horses back to use for other projects.

Clothesline Ratchet with Duct Tape

My next project using duct tape was just outside.  My wife put up a nice clothesline this year.  I say nice because it was so quick and inexpensive since we were able to put a clothesline up around two trees.  The problem was that the clothesline would sag under the weight of clothes hanging on it.  It was a lot of trouble to untie the knots and adjust the line every time it sagged.  The cotton clothesline is stretchy and tends to sag a bit over time.  I bought a metal ratchet that is normally used for a wire fence to use to tighten up the clothesline easily.  I was worried that the metal ratchet would cut the clothesline where the metal was in contact with the cotton clothesline, so I wrapped this part of the clothesline with duct tape to protect it.


Ratchet to Tighten Clothesline Protected with Duct Tape
Image Source: Dr. Penny Pincher
I used my favorite 3M silver duct tape again for this project.  You can see the duct tape to the left of the ratchet in the photo where I wrapped it around the clothesline to protect it from being cut or damaged from the tension of the line against the metal edge of the ratchet.  Just pull on the short piece of line hanging down to tighten up the clothesline.


I didn't need to try very hard to find examples of duct tape projects and duct tape repairs around my house.  A little creativity and a little duct tape can go a long way for making cheap repairs and doing quick and easy projects.

Copyright © 2015 Dr. Penny Pincher.  All Rights Reserved.  Privacy Policy
Sunday, April 12, 2015

Rust Converter- Turn Rusty Metal into Primer

Rust Converter- Restore Rusty Items

I have always been interested in rust converter.  You can put rust converter on a rusty metal surface and it forms a black protective coat, ready for painting.  Rust converter works using a chemical reaction with tannic acid which converts iron oxide into black colored ferric tannate, which is much more stable than rust.  I like that rust converter chemically reacts with the rust to convert it to something else.  I like the idea of changing the rust into something else instead of just painting over it and watching it rust through again later.

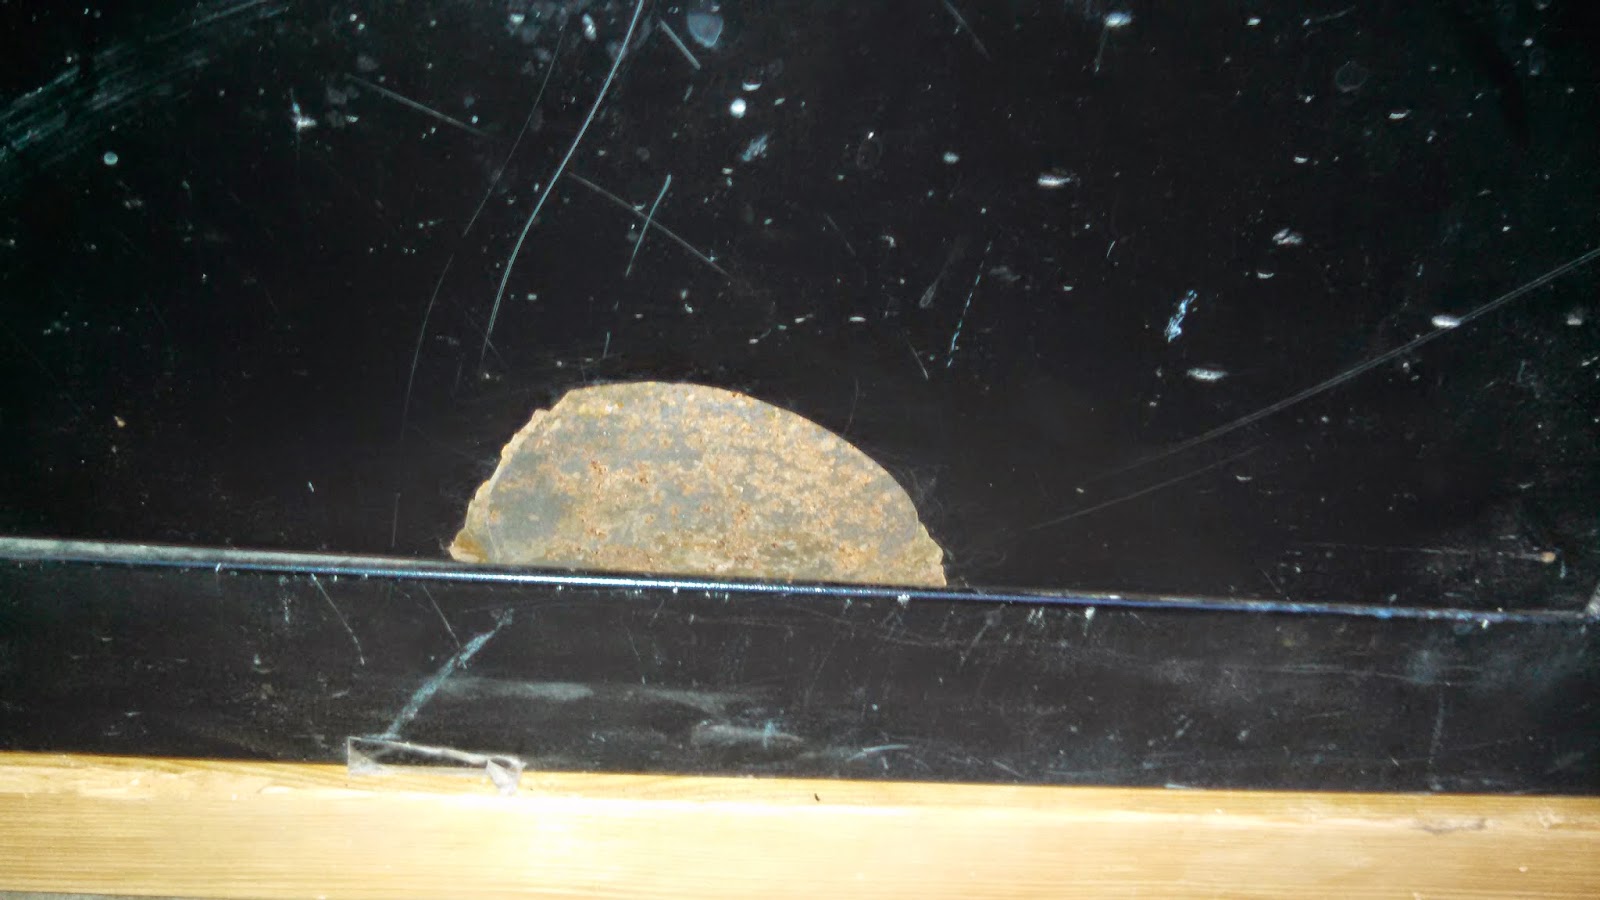
My son's car has some rust coming through at the bottom.  Conveniently, his car is black, so the black ferric tannate will almost match his car's color.  I also have a black metal cabinet in my shop that has a rusty spot about 1 inch tall by 2 inches wide where the paint chipped off.  I'll try the rust converter on the metal cabinet first before we try it on my son's car.

Before Rust Converter


Rusty Metal Surface- Before Rust Converter
Image Source: Dr. Penny Pincher

As you can see, there is a rusty spot on my metal cabinet.  This is a great place to try out the rust converter.

Permatex Rust Converter
Image Source: Dr. Penny Pincher

I went with Permatex Rust Treatment, which is a rust converter.  An 8 oz bottle which can convert 20 square feet sells for about $6.50.  A 16 oz bottle sells for around $10.  You can buy this at a car parts store or on amazon:
Permatex 81773 Rust Treatment , 16 oz.

Applying Rust Converter with Small Paintbrush
Image Source: Dr. Penny Pincher

When applying rust converter, it is important to pour a small amount into a different container.  If you dip your brush into the bottle, the chemical can activate from rust on your brush, ruining the whole bottle of rust converter.  I found a cup in my recycling bin and wiped it out.  I poured a very small amount into the cup since my rusty surface was pretty small.  I used a small paintbrush to apply the rust converter to the rusty surface.

Rust Converter- First Coat, Wet
Image Source: Dr. Penny Pincher

The photo above shows the first coat of rust converter while it is still wet.  It didn't take much at all to cover this small rusty patch.  After 15 minutes, I put on a second coat.  The photo below shows the rusty area with a second coat of rust converter while still wet.


Rust Converter, Second Coat, Wet
Image Source: Dr. Penny Pincher

At this point, I was a bit worried.  I was putting the rust converter on to make the rusty spot less noticeable, but now it was very noticeable since it was white.  I went let the rust converter dry overnight and came back to check out the results the next morning.

After Rust Converter

I was happy to see that the rust converter did turn black as promised.  The rust converter is suitable as a primer.  I think the black color is close enough, and the metal cabinet is in a protected area in my shop, so I don't think I will paint it.  I will just leave the rust converter as the top coat.


After Rust Converter- The Rust is Completely Converted to Black Primer
Image Source: Dr. Penny Pincher


Close-up of Rusty Surface After Rust Converter.  The Rust Has Transformed into a Black Surface.
Close-up of Rusty Surface After Rust Converter.  The Rust Has Transformed into a Black Surface.
Image Source: Dr. Penny Pincher

I will definitely go ahead and use rust converter on my son's car.  I will plan to put paint on over the rust converter since the car will be exposed to water and salt in the winter.

Rust converter is a great way to take care of rusty surfaces, stopping the rust and providing a good primer coat that can be painted.

Permatex 81773 Rust Treatment , 16 oz.

Copyright © 2015 Dr. Penny Pincher.  All Rights Reserved.  Privacy Policy

Tuesday, October 14, 2014

Programmable Thermostat: How to Install a Replacement Thermostat and Save Money

Replace Your Thermostat and Save Money

Save Money with a Programmable Thermostat
Image Source: Dr. Penny Pincher

Heating season just started here in Iowa, and last week I noticed a problem in the middle of the night.  I was hot, and the furnace was running.  The problem was that this meant I was wasting money.  Why was the furnace running when I was hot?  Why was it so warm in the middle of the night?

The problem was the old thermostat.  It was still working fine, but it was primitive by today's standards.  The old thermostat only had one temperature setting.  The reason it was hot at night, is because we turned it to 70 to warm up the house and forgot to turn it down for the night.  Sometimes we left for the day and forgot to turn it down then too.


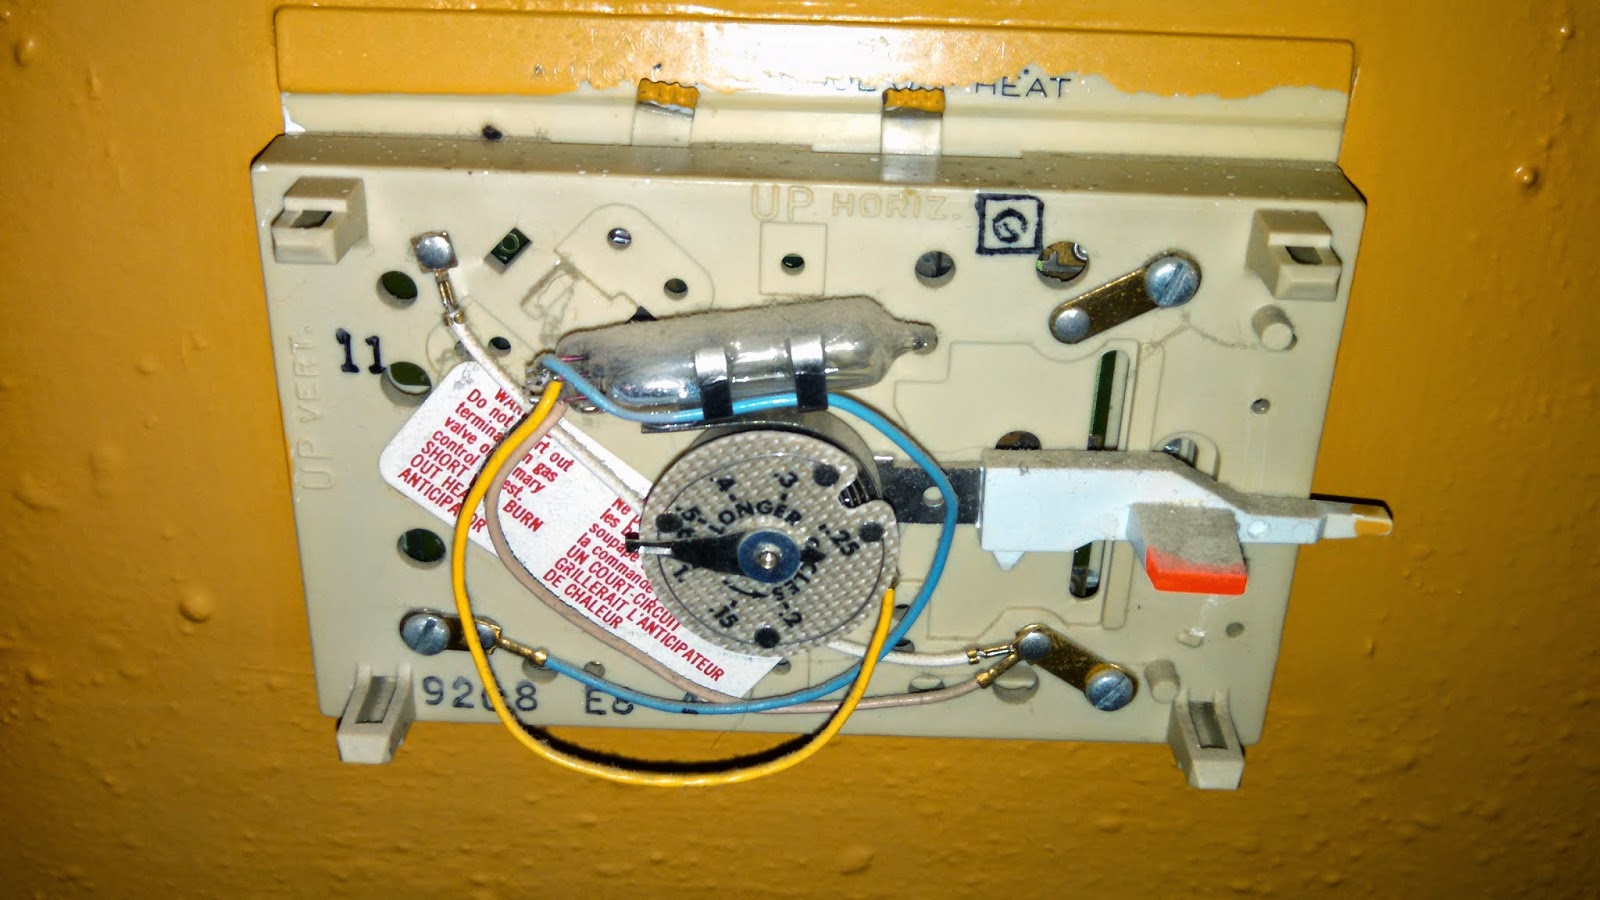
Old Lennox Thermostat
Image Source: Dr. Penny Pincher
Another problem with the old thermostat was that the temperature control was not very precise.  It had a sliding lever to set the temperature, and it was hard to make small adjustments.  Also, the old analog temperature sensor did not seem to be very precise.  This all adds up to wasted energy and wasted money.  I decided to look at a replacement thermostat options.

Programmable Thermostats

Modern thermostats are programmable and allow you to program different temperatures for different times of day.  For example, you can program a temperature you want the house when you wake up, and another temperature when you are gone for the day, another temperature when you get home, and another for after you are asleep in bed.  You can let the thermostat program run and it automatically adjusts the temperature for you.  You can override the program at any time if you want to adjust the temperature.

7-day Programmable Thermostat
Image Source: Dr. Penny Pincher

You can get thermostats that are 1-day, 5-2 day, 5-1-1 day, and 7-day programmable.  A 1-day programmable thermostat has a single program that it follows every day.  A 5-2 day programmable thermostat gives you a program for Monday-Friday, plus a program for Saturday and Sunday.  A 5-1-1 day programmable thermostat allows you to set a program for Monday-Friday, Saturday, and Sunday separately.  A 7-day programmable thermostat is the most flexible and allows you to set a different temperature program for every day of the week.

At our house, the schedule varies quite a bit, so I was interested in a 7-day programmable thermostat.  I wanted something that could automatically turn the temperature down at night and while everyone is out during the day.  With the old thermostat, it was too easy to forget to turn the temperature down.

Do You Need a Wi-Fi Thermostat?

 I looked at Nest and some other expensive thermostats that allow you to control your heating and cooling system using a cell phone through your home's wireless network.  This seemed like more than I needed, and thermostats with wi-fi capability cost $200 or more.  It may be handy sometimes to adjust the temperature while you are away from home, but I think a good 7-day programmable thermostat would cover almost everything I want to do.

I found some good programmable thermostats in the $80 price range from Honeywell and White-Rodgers.  The Honeywell model I selected is a 7-day programmable thermostat with a full touchscreen.  There are no buttons or levers on the thermostat at all.  It has an easy menu system to program it, and a nice backlight when you touch it.


How To Install A Programmable Thermostat

Finding and buying a replacement thermostat was the easy part.  Next, I had to install the thermostat.  The first step was to carefully remove the old thermostat.  I say carefully for several reasons.  First, the old thermostat was really old and brittle.  I wanted to remove it carefully in case I needed to put it back- for example if the replacement thermostat turned out not to be compatible with the furnace and central air.  Second, the old thermostat contains a mercury switch.  It has a drop of mercury inside- kind of fun to look at, but I wouldn't want the capsule to break and spill the mercury.  Mercury is a toxic substance and can cause neurological damage.

My old Lennox thermostat had 3 layers:
  1. A cover with plastic windows to see the temperature setting
  2. A layer with the mercury switch and a thermometer coil with bi-metalic strips.  The movement of the coil causes the mercury switch to tip and makes or breaks the circuit to turn the furnace off or on.
  3. The layer with a circuit card and wire connections to the furnace
Outer Cover of Old Thermostat
Image Source: Dr. Penny Pincher

Thermometer Coil and Mercury Switch in Old Thermostat
Image Source: Dr. Penny Pincher

Circuit Card and Wire Connections in Old Thermostat
Image Source: Dr. Penny Pincher


I turned off the power to my furnace using the circuit breaker before working on the thermostat.  I turned the fan on so I could make sure I turned off the right breaker to the furnace.  When the fan turned off, I knew I had the right one.  Some furnaces have a light switch on the side that can be used to turn off power instead of the circuit breaker.

Turn Off Power to Your Furnace Before Replacing the Thermostat
Image Source: Dr. Penny Pincher

Now it was time to remove the old thermostat.  I had to carefully remove the first two layers to reveal the bottom layer which was attached to the wall with screws to mount it to a metal junction box.  The pictures above show the layers that I had in my old thermostat.  I separated the first two layers by snapping them apart carefully.  Since the mercury switch contains mercury, I'll need to find a place to safely dispose of it.  I don't want to let mercury get into the water supply.

With the circuit card exposed, I could find the wires to connect the furnace to the new thermostat.  Before removing any wires from the old thermostat, label the wires carefully.  My Honeywell replacement thermostat included stickers to label the wires.  The circuit card in the old thermostat had each of the 4 wires labeled: RC, Y, W, G.  I removed the screws holding the wires down and applied the labels.  I also took pictures before disconnecting anything.

Next, I removed the last layer of the old thermostat from the wall.  My unit had two screws holding it on the wall.  I straightened out the wires so I could easily remove the last part of the old thermostat.

Now it was time to install the new thermostat.  The directions were pretty clear.  The most important thing is to carefully label the wires and attach them to the proper place on the new thermostat.  The wires are connected using a terminal block with screws to connect the wires and hold them in place.  You'll need a small screwdriver to tighten these down.

Honeywell Programmable Thermostat Wire Connection and Mounting Plate
Image Source: Dr. Penny Pincher

Depending on how your old thermostat was mounted, you may need to install a couple drywall anchors to mount the new thermostat to the wall.  In my case, I got lucky.  The hole spacing worked fine to attach the new thermostat to the existing junction box.  That was easy!

After connecting the wires to the new thermostat, and double-checking that the wires are connected to the right spots, you get to install the front of the thermostat on the mounting plate.  Install the batteries, and then snap the front onto the mounting plate.

Honeywell Thermostat, Battery Installation
Image Source: Dr. Penny Pincher


This Thermostat Has a Nice Touchscreen with Backlight
Image Source: Dr. Penny Pincher

Here's more info about my programmable thermostat:
Honeywell RTH7600D Touchscreen 7-Day Programmable Thermostat

Saving Money with a Programmable Thermostat

This unit worked right out of the box.  The touchscreen and menus are easy to use.  I adjusted the pre-programmed temperature settings a bit by lowering the warmest temperature from 70 down to 68.  I am starting with 62 at night and during weekdays when everyone is usually away from home.  I am sure we will make further adjustments to the temperature and also the time of day when the temperature program adjusts the temperature.  I think this thermostat will pay for itself within a few months, and it keeps the indoor temperature more comfortable.  Replacing your thermostat a good project to consider if you have an older thermostat.


Copyright © 2014 by Dr. Penny Pincher.  All Rights Reserved.  Privacy Policy

Recent Penny Pincher Posts